Showing posts with label beanie. Show all posts

Monday, July 13, 2015

Fair Lil' Baby Beanie

First... I could just scream. I can't believe I'm finally getting you guys a new freebie (for those of you who didn't know, I ended up with a pretty bad case of pregnancy induced carpel tunnel :( It's made crocheting basically impossible). It's a simple hat but the look is beautiful and it can be made with the recommended material (wool blend) for the cooler temps) or with I Love This Cotton for the warmer temps. That definitely makes it a winner in my book. Not to mention the color options are endless.

All babies look good in stripes. Mostly because babies can pull off just about any adorable look :p

Aaaand, not only am I bringing you a new free beanie pattern but I designed a new flower just for this hat too. You can use it on other hats to ;) lol

I hope you all like it!


Wednesday, January 28, 2015

Girl on Fire Graph Hat

When I first drew up the graph for this hat, I wasn't sure what to call it. One friend of mine suggested calling it the "Fight Fire with Fire" graph hat but while I was making it, Hunger Games popped into my mind and hence, Girl on Fire :p Which of the two names do you like better? 

Despite the chosen name, this particular graph hat is just as much for the guys as it is for the girls :) It can be worked up in any size and is super warm and stretchy! If you really like the hat or would like the actual graph, you can purchase the PDF in my Ravelry store. The PDF includes the pattern (which is also free below) but has the added bonus of the visual graph for those of you who have a harder time following written patterns as well as an additional image of the hat from a slightly different angle! The PDF can be purchase for $2.50 HERE.


Hook: I (toddler); J (young child to adult – refer to notes)
Gauge: 3 rounds & 3st = 1”
Material: Red Heart Super Saver OR Loops & Threads Impeccable

Hints & Tips:
-          For toddler use an I hook and start the graph after round 7 (skip round 8).
-          For infant, also use an I hook, skip round 5 so that you only have 48 dc and only repeat to round 6 ending with 20 rounds – you may want to start graph at 8 st instead of 14 like is written.
-          For adult, repeat round 6 - 9
-          Pattern is written in older child size.

Abbreviations/stitches:
-          Ch – chain
-          Dc – double crochet
-          Sl st – slip stitch
-          Fpdc – front post double crochet
-          Fphdc – front post half double crochet
-          St – stitch

Round 1) With MC, using magic circle, ch 2, 12 dc in circle, pull tight and join to first st with sl st – 12 dc

Round 2) Ch 2, 2 fpdc around every st around, join to first st with sl st – 24 dc

Round 3) Ch 2, *fpdc around next st, 2 fpdc around next st* around, join to first st with sl st – 36 dc

Round 4) Ch 2, *fpdc around next 2 st, 2 fpdc around next st* around, join to first st with sl st – 48 dc

Round 5) Ch 2, *fpdc around next 3 st, 2 fpdc around next st* around, join to first st with sl st – 60 dc

Round 6 – 10) Ch 2, fpdc around every st around, join to first st with sl st – 60 dc

Round 11) Ch 2, fpdc around next 40 st, change to Y, fpdc around next st, change to MC, fpdc around to end, join to first st with sl st – 60 dc

Round 12) Ch 2, fpdc around next 17 st, change to Y, fpdc around next st, change to MC, fpdc around next 11 st, change to Y, fpdc around next st, change to MC, fpdc around next 9 st, change to Y, fpdc around next st, change to MC, fpdc around next 14 st, change to Y, fpdc around next st, change to MC, fpdc around to end, join to first st with sl st – 60 dc

Round 13) Ch 2, fpdc around next 12 st, change to Y, fpdc around next st, change to MC, fpdc around next 5 st, change to Y, fpdc around next st, change to MC, fpdc around next 7 st, change to Y, fpdc around next st, change to MC, fpdc around next 3 st, change to Y, fpdc around next st, change to MC, fpdc around next 4 st, change to Y, fpdc around next st, change to MC, fpdc around next 4 st, change to Y, fpdc around next st, change to MC, fpdc around next 2 st, change to Y, fpdc around next st, change to MC, fpdc around next 5 st, change to Y, fpdc around next st, change to MC, fpdc around next 3 st, change to Y, fpdc around next st, change to MC, fpdc around to end, join to first st with sl st – 60 dc

Round 14) Ch 2, fpdc around next 3 st, change to Y, fpdc around next st, change to MC, fpdc around next 7 st, change to Y, fpdc around next st, change to MC, fpdc around next 5 st, change to Y, fpdc around next st, change to MC, fpdc around next 5 st, change to Y, fpdc around next st, change to MC, fpdc around next st, change to Y, fpdc around next st, change to MC, fpdc around next 3 st, change to Y, fpdc around next st, change to MC, fpdc around next 6 st, change to Y, fpdc around next st, change to MC, fpdc around next 2 st, change to Y, fpdc around next st, change to MC, fpdc around next 2 st, change to Y, fpdc around next st, change to MC, fpdc around next 7 st, change to Y, fpdc around next st, change to MC, fpdc around next 3 st, change to Y, fpdc around next st, change to MC, fpdc around to end, join to first st with sl st – 60 dc

Round 15) Ch 2, fpdc around next 2 st, change to Y, fpdc around next st, change to MC, fpdc around next 3 st, change to Y, fpdc around next st, change to MC, fpdc around next 5 st, change to Y, fpdc around next st, change to MC, fpdc around next st, change to Y, fpdc around next st, change to MC, fpdc around next 3 st, change to Y, fpdc around next st, change to MC, fpdc around next 3 st, change to Y, fpdc around next st, change to MC, fpdc around next 3 st, change to Y, fpdc around next st, change to MC, fpdc around next st, change to Y, fpdc around next st, change to MC, fpdc around next 6 st, change to Y, fpdc around next st, change to MC, fpdc around next 3 st, change to Y, fpdc around next st, change to MC, fpdc around next 3 st, change to Y, fpdc around next st, change to MC, fpdc around next 3 st, change to Y, fpdc around next st, change to MC, fpdc around next st, change to Y, fpdc around next st, change to MC, fpdc around next 5 st, change to Y, fpdc around next st, change to MC, fpdc around next 2 st, change to Y, fpdc around next st, change to MC, fpdc around to end, join to first st with sl st – 60 dc

Round 16) Ch 2, fpdc around next 3 st, change to Y, fpdc around next st, change to MC, fpdc around next 3 st, change to Y, fpdc around next st, change to MC, fpdc around next 3 st, change to Y, fpdc around next st, change to MC, fpdc around next 3 st, change to Y, fpdc around next st, change to MC, fpdc around next st, change to Y, fpdc around next st, change to MC, fpdc around next 5 st, change to Y, fpdc around next st, change to MC, fpdc around next st, change to Y, fpdc around next st, change to MC, fpdc around next 3 st, change to Y, fpdc around next st, change to MC, fpdc around next 4 st, change to Y, fpdc around next st, change to MC, fpdc around next 3 st, change to Y, fpdc around next st, change to MC, fpdc around next 3 st, change to Y, fpdc around next st, change to MC, fpdc around next 3 st, change to Y, fpdc around next st, change to MC, fpdc around next 4 st, change to Y, fpdc around next st, change to MC, fpdc around next 3 st, change to Y, fpdc around next st, change to MC, fpdc around next 4 st, change to Y, fpdc around next st, join to first st with sl st – 60 dc

Round 17) Ch 2, fpdc around next 2 st, *change to Y, fpdc around next st, change to MC, fpdc around next 3 st* around, join to first st with sl st – 60 dc

Round 18) Ch 1, fpdc around 1st st, *change to Y, fpdc around next st, change to O, fpdc around next st, change to Y, fpdc around next st, change to MC, fpdc around next st* around, join to first st with sl st – 60 dc

Round 19 - 20) With Y, Ch 2, fpdc around next st, *change to O, fpdc around next st, change to R, fpdc around next st, change to O, fpdc around next st, change to Y, fpdc around next st* around, join to first st with sl st – 60 dc

Round 21) With R, ch 2, fpdc around to end, join to first st with sl st – 60 dc


Round 22) With MC, ch 2, fpdc around to end, join to first st with sl st – 60 dc 


Wednesday, January 21, 2015

I Love U Graph Hat

This crochet graph hat is the last in the Valentine's Day series I've been working on. :) It's cute, works up quickly and you're sure to love it as another V-Day hat to make! The instructions come in all sizes (make sure to read the hints & tips) and can be made in any worsted weight material!

Make sure you check out the Ravelry listing HERE - add it to your favorites, make up a hat and add a photo or, if you really like the hat, buy the PDF on Ravelry for just $2.50 which will ensure you ALWAYS have it even if I ever discontinue the pattern. The PDF also includes the actual graph for those of you who prefer to use a graph rather than written instructions. If you don't want to buy the PDF just scroll on down and get the free version on my blog. :)

One last note: A big thank you to my friend Sarah. She contributed to the Valentine's Day graph designs I've been releasing lately, even working up some of the patterns for me and letting me use her photos when I was sick and unable to crochet! <3 She has not only designed the graphs for some of my hats but inspired many of the graphs I've created!


Hook: I (toddler); J (young child to adult – refer to notes)
Gauge: 3 rounds & 3st = 1”
Material: Red Heart Super Saver OR Loops & Threads Impeccable

Hints & Tips:
-          For toddler use an I hook and start the graph after round 7 (skip round 8).
-          For infant, also use an I hook, skip round 5 so that you only have 48 dc and only repeat to round 6 ending with 20 rounds – you may want to start graph at 8 st instead of 14 like is written.
-          For adult, repeat round 6 - 9
-          Pattern is written in older child size.

Abbreviations/stitches:
-          Ch – chain
-          Dc – double crochet
-          Sl st – slip stitch
-          Fpdc – front post double crochet
-          Fphdc – front post half double crochet
-          St – stitch

Round 1) With MC, using magic circle, ch 2, 12 dc in circle, pull tight and join to first st with sl st – 12 dc

Round 2) Ch 2, 2 fpdc around every st around, join to first st with sl st – 24 dc

Round 3) Ch 2, *fpdc around next st, 2 fpdc around next st* around, join to first st with sl st – 36 dc

Round 4) Ch 2, *fpdc around next 2 st, 2 fpdc around next st* around, join to first st with sl st – 48 dc

Round 5) Ch 2, *fpdc around next 3 st, 2 fpdc around next st* around, join to first st with sl st – 60 dc

Round 6 – 8) Ch 2, fpdc around every st around, join to first st with sl st – 60 dc

Round 9) Ch 2, fpdc around next 14 st, change to CC1, fpdc around next 6 st, change to MC, fpdc around to end, join to first st with sl st – 60 dc

Round 10) Ch 2, fpdc around next 14 st, change to CC1, fpdc around next 6 st, *change to CC2, fpdc around next 2 st, change to MC*, fpdc around next 3 st, repeat from *-* once more, fpdc around to end, join to first st with sl st – 60 dc

Round 11) Ch 2, fpdc around next 16 st, change to CC1, fpdc around next 2 st, *change to MC, fpdc around next st, change to CC2, fpdc around next 4 st*, repeat from *-* once more, change to MC, fpdc around to end, join to first st with sl st 60 dc

Round 12) Ch 2, fpdc around next 16 st, change to CC1, fpdc around next 2 st, change to MC, fpdc around next st, change to CC2, fpdc around next 9 st, change to MC, fpdc around to end, join to first st with sl st – 60 dc

Round 13) Ch 2, fpdc around next 16 st, change to CC1, fpdc around next 2 st, change to MC, fpdc around next 2 st, change to CC2, fpdc around next 7 st, change to MC, fpdc around to end, join to first st with sl st – 60 dc

Round 14) Ch 2, fpdc around next 14 st, change to CC1, fpdc around next 6 st, change to MC, fpdc around next st, change to CC2, fpdc around next 5 st, change to MC, fpdc around to end, join to first st with sl st – 60 dc

Round 15) Ch 2, fpdc around next 14 st, change to CC1, fpdc around next 6 st, change to MC, fpdc around next 2 st, change to CC2, fpdc around next 3 st, change to MC, fpdc around to end, join to first st with sl st – 60 dc

Round 16) Ch 2, fpdc around next 17 st, change to CC1, fpdc around next 2 st, change to MC, fpdc around next 2 st, change to CC1, fpdc around next 2 st, change to CC2, fpdc around next st, change to MC, fpdc around to end, join to first st with sl st – 60 dc

Round 17 – 20) Ch 2, fpdc around next 17 st, change to CC1, fpdc around next 2 st, change to MC, fpdc around next 2 st, change to CC1, fpdc around next 2 st, change to MC, fpdc around to end, join to first st with sls t – 60 dc

Round 21) Ch 2, fpdc around next 18 st, change to CC1, fpdc around next 4 st, change to MC, fpdc around to end, join to first st with sl st – 60 dc

Round 22) Ch 2, fpdc around next 19 st, change to CC2, fpdc around next 2 st, change to MC, fpdc around to end, join to first st with sl st – 60 dc

Round 23) Ch 1, fphdc around to end, join to first st with sl st and tie off – 60 hdc


Tuesday, December 9, 2014

Braids & Cables Beanie & Cowl Set

I'm going to release a pattern early today... and it is officially the FIRST free crochet pattern I'm listing that uses the Battle of the Stitches Round 3 stitch! This pattern is easy to figure out and works up quickly. A link to a tutorial video is provided below and the hints & tips section will give you some extra help too!

Scroll down for the free patterns... want to save the pattern to your Ravelry library or print it off easily? Buy it on Ravelry for just $2.50 HERE.


Hook: J
Material: Red Heart with Love
Gauge: 3 dc & 2 rounds (1 sc + 1 dc) = 1”

Hints & Tips:
-          The sc round gets skipped over when working the front post stitches. You can see a tutorial video HERE.
-          The cowl/scarf is designed to be approximately 72” long at the gauge written. The gauge isn’t super important with the cowl unless you want it to be the same size as the one in the photo taken. The gauge IS important with the hat.
-          When measuring the cowl’s gauge, I stretched it out to its normal length. The cables make it seem a little “tighter” than it is and made a sc and dc round right under an inch. Once I stretched it out a bit, it fit the gauge I wrote which is the same gauge as the hat.
-          The hat is designed to be unisex. I did not add a pom-pom to the one in the photo but that is an excellent option!
-          The hat is a little tricky. Round 4 has less stitches than round 3 and this might throw you off. It is correct. The reason being the cable stitches are worked OVER round 3 and into round 2. Round 3’s increases are just used as a filler round and to increase the hat size. The stitch counts are correct.
-     This pattern is sized in adult only.

Special Stitches:
-          Braid - BR – sk next st, fptrc in each of next 2 sts, working in front of last 2 sts, fptrc in skipped st
-          Front Post Triple Crochet – fptrc – YO 2x, insert hook around post of specified st (the post will be towards the front of the hook, not behind it) and draw up a loop, *YO and throw through 2 loops on hook* 3 times

Abbreviations/stitches:
-          Ch – chain
-          Dc – double crochet
-          Sl st – slip stitch
-          Fpdc – front post double crochet
-          St – stitch
-          Sc – single crochet
-          Bpdc – back post double crochet
-          BR – braid
-          Fptrc – front post triple/treble crochet


Beanie:
Round 1) Using magic circle, ch 2, 15 dc in circle, pull tight and join to first st with sl st – 15 dc

Round 2) Ch 2, 2 fpdc around every st around, join to first st with sl st – 30 dc

Round 3) Ch 1, sc in 1st st, 2 sc in next st, *sc in next st, 2 sc in next st* around, join to first st with sl st – 45 sc

Round 4) Ch 2, dc in same 1st st, fptrc around first dc from round 2, BR, fptrc around next dc, dc in next 2 st, *fptrc around next dc from round 2, BR, fptrc around next dc from round 2, dc in next 2 st* around ending with a dc in last st of round 3, join to first st with sl st – 42 st – 6 BR

Round 5) Ch 1, sc in 1st st and next 5 st, 2 sc in next st, *sc in next 6 st, 2 sc in next st* around, join to first st with sl st – 48 sc

Round 6) Ch 2, dc in 1st st, dc in next st, fptrc around fptrc, BR, fptrc around fptrc, dc in next 4 st, *fptrc around fptrc, BR, fptrc around fptrc, dc in next 4 st* around ending with 2 dc, join to first st with sl st – 54 st

Round 7) Ch 1, sc in every st around, join to first st with sl st – 54 sc

Round 8) Ch 2, dc in 1st 2 st, *fptrc around fptrc, BR, fptrc around fptrc, dc in next 4 st* around ending with 2 dc, join to first st with sl st – 54 st

Round 9) Ch 1, sc in every st around, join to first st with sl st – 54 sc

Round 10 - 21) Repeat rounds 8 & 9

Round 22) Ch 1, turn (so that the front of your stitches are facing the inside of the hat), dc in every st around, join to first st with sl st – 54 dc

Round 23) Ch 1, fpdc around 1st st, bpdc around next st, *fpdc around next st, bpdc around next st* around, join to first st with sl st – 54 dc

Round 24 – 25) Repeat round 23 and then tie off at end of round 25

Fold last four rounds over so that the right sides of the stitches face out.

Cowl/Scarf:
Row 1) Ch 22, turn and sc in 2nd ch from hook and across – 21 sc

Row 2) Ch 1, turn, dc in every st across – 21 dc

Row 3) Ch 1, turn, sc in every st across – 21 sc

Row 4) Ch 1, turn, dc in 1st st, fptrc around 2nd dc of round 2, BR, fptrc around next dc of round 2, dc in next 9 st, fptrc around dc of round 2, BR, fptrc around dc of round 2, dc in last st – 21 st

Row 5) Ch 1, turn, sc in every st across – 21 sc

Row 6) Ch 1, turn, dc in 1st st, fptrc around fptrc, BR, fptrc around fptrc, dc in next 9 st, fptrc around fptrc, BR, fptrc around fptrc, dc in last st – 21 st

Row 7 - 143) Repeat rows 5 & 6 ending with row 143 being a repeat of row 5

For cowl, face right sides of cowl together and slip st the last row and the first row together before tying off.

For scarf, tie off and weave in ends or add fringe to the bottom.  


Wednesday, November 26, 2014

Full of Love Ear-flap Beanie


This pattern is similar to my very first graph beanie but slightly different. This is the first official graph pattern that has a newborn specific size! It is also the first graph hat that includes instructions on adding ear-flaps. Once you figure out the placement, the actual earflap piece will be easy :) I've grown so much as a designer since my first graph beanie design so you will notice differences in the gauge for this hat as well as the suggested hook size. Always make sure you check your gauge and adjust your hook size to your needs. Enjoy the free patterns! One size is for newborns and the other size will fit from babies to toddlers (for younger sizes, leave off a round and for larger rounds add a round before the graph). 

Hook: J
Material: Red Heart Super Saver
Gauge: 3 st & 3 rounds = 1”

Hints & Tips:
-          When making ear flaps, use your best judgment. The instructions are guidelines to help you get them in the right place but so long as you follow the instructions once you get your placement, they should turn out right. There are different preferences for their placement which is why I say they are guidelines.

Newborn size:
Round 1) Using magic circle, ch 2, 12 dc in circle, pull tight and join to first st with sl st – 12 dc

Round 2) Ch 2, 2 fpdc around every st, join to first st with sl st – 24 dc

Round 3) Ch 2, fpdc around 1st st, 2 fpdc around next st, *fpdc around next st, 2 fpdc around next st* around, join to next st with sl st – 36 dc

Round 4 - 8) Ch 2, fpdc around every st, join to first st with sl st – 36 dc

Round 9) Ch 2, fpdc around 12 st, change to CC, fpdc around next st, change to MC, fpdc around next 3 st, change to CC, fpdc around next st, change to MC, fpdc around to end, join to first st with sl st – 36 dc

Round 10) Ch 2, fpdc around 11 st, change to CC, fpdc around next 3 st, change to MC, fpdc around next st, change to CC, fpdc around next 3 st, change to MC, fpdc around to end, join to first st with sl st – 36 dc

Round 11) Ch 2, fpdc around 11 st, change to CC, fpdc around next 7 st, change to MC, fpdc around to end, join to first st with sl st – 36 dc

Round 12) Ch 2, fpdc around 12 st, change to CC, fpdc around next 5 st, change to MC, fpdc around to end, join to first st with sl st – 36 dc

Round 13) Ch 2, fpdc around 13 st, change to CC, fpdc around next 3 st, change to MC, fpdc around to end, join to first st with sl st – 36 dc

Round 14) Ch 2, fpdc around 14 st, change to CC, fpdc around next 1 st, change to MC, fpdc around to end, join to first st with sl st – 36 dc

Round 15) Ch 2, fpdc around every st, join to first st with sl st and tie off – 36 dc

Right Earflap:
Right: With the front of the hat facing you, start counting from post right outside the edge of the heart – count 8 st and join there

Row 1) Join with fpdc around 12th post from edge of heart, fpdc around next 7 st – 8 dc

Row 2) Ch 1, turn, sk 1st st, bpdc around next st, bpdc around next 4 st, next work one bpdc around both remaining stitches together  (looks best if you go between the stitches and the ch 1 to keep the ch 1 on the edge) – 6 dc

Round 3) Ch 1, turn, sk 1st st, fpdc around next st, fpdc around next 2 st, next work one fpdc around both remaining st together – 4 dc

Round 4) Ch 1, sk 1st st, bpdc around next st, next work one bpdc around both remaining st together and tie off – 2 dc

Left Earflap:
Count 12 post across the front of the hat from the end of the ear flap you just made and repeat instructions for right ear flap. This should make each ear flap 8 st across leaving 12 st across the forehead and 8 st across the back.

Edging:
With CC, join with fpsc where you tied off in round 15, fpsc around next 2 st, work 7 sc up side of ear flap, 3 sc at tip of ear flap, work 7 sc down ear flap, fpsc around next 12 st, work 7 sc up side of ear flap, 3 sc at tip of ear flap, work 7 sc down ear flap, fpsc around to end, join to first st with sl st and tie off.  


Toddler/young child size:
Round 1) Using magic circle, ch 2, 12 dc in circle, pull tight and join to first st with sl st – 12 dc

Round 2) Ch 2, 2 fpdc around every st, join to first st with sl st – 24 dc

Round 3) Ch 2, fpdc around 1st st, 2 fpdc around next st, *fpdc around next st, 2 fpdc around next st* around, join to next st with sl st – 36 dc

Round 4) Ch 2, fpdc around 1st st, fpdc around next st, 2 fpdc around next st, *fpdc around next 2 st, 2 fpdc around next st* around, join to first st with sl st – 48 dc

Round 5 – 13) Ch 2, fpdc around every st around, join to first st with sl st – 48 dc

Round 14) Ch 2, fpdc around 14 st, change to CC, fpdc around next st, change to MC, fpdc around next 3 st, change to CC, fpdc around next st, change to MC, fpdc around to end, join to first st with sl st – 48 dc

Round 15) Ch 2, fpdc around 13 st, change to CC, fpdc around next 3 st, change to MC, fpdc around next st, change to CC, fpdc around next 3 st, change to MC, fpdc around to end, join to first st with sl st – 48 dc

Round 16) Ch 2, fpdc around 13 st, change to CC, fpdc around next 7 st, change to MC, fpdc around to end, join to first st with sl st – 48 dc

Round 17) Ch 2, fpdc around 14 st, change to CC, fpdc around next 5 st, change to MC, fpdc around to end, join to first st with sl st – 48 dc

Round 18) Ch 2, fpdc around 15 st, change to CC, fpdc around next 3 st, change to MC, fpdc around to end, join to first st with sl st – 48 dc

Round 19) Ch 2, fpdc around 16 st, change to CC, fpdc around next 1 st, change to MC, fpdc around to end, join to first st with sl st – 48 dc

Round 20) Ch 2, fpdc around every st, join to first st with sl st and tie off – 48 dc

Earflaps:
Right: With the front of the hat facing you, start counting from post right outside the edge of the heart – count 12 st and join there
Row 1) Joining with a fpdc, work 12 fpdc – this will place you on the post right outside the edge of the heart – 12 dc

Row 2) Ch 1, turn, sk 1st st, bpdc around next st, bpdc around next 10 st, next work one bpdc around both remaining stitches together  (looks best if you go between the stitches and the ch 1 to keep the ch 1 on the edge) – 10 dc

Round 3) Ch 1, turn, sk 1st st, fpdc around next st, fpdc around next 8 st, next work one fpdc around both remaining st together – 8 dc

Round 4) Ch 1, turn, sk 1st st, bpdc around next st, bpdc around next 6 st, next work one bpdc around both remaining st together – 6 dc

Round 5) Ch 1, turn, sk 1st st, fpdc around next st, fpdc around next 4 st, next work one fpdc around both remaining st together – 4 dc

Round 6) Ch 1, sk 1st st, bpdc around next st, bpdc around both remaining st together and tie off – 2 dc

Left:
Count 16 post across the front of the hat from the end of the ear flap you just made and repeat instructions for right ear flap. This should make each ear flap 12 st across leaving 16 st across the forehead and 8 st across the back.

Edging:
With CC, join with fpsc where you tied off in round 15, fpsc to earflap, work 10 sc up side of ear flap, 3 sc at tip of ear flap, work 10 sc down ear flap, fpsc around next 16 st, work 10 sc up side of ear flap, 3 sc at tip of ear flap, work 10 sc down ear flap, fpsc around to end, join to first st with sl st. 

Friday, November 21, 2014

Faye's Beanie


How about a brand new pattern? This pattern, named after my daughter because she was the inspiration behind it, is super cute and includes a toddler/young child size AND a teen/adult size!

It works up quickly, has a super stretchy brim and will make a wonderful gift for those you know who love beanies! It's a little thicker than the average beanie with an awesome texture and feel to it. :)

Check it out at Ravelry and Etsy (coming soon).

Ravelry

Wednesday, November 12, 2014

Two Toned Colorado Beanie


If you're not from Colorado, you can still use this pattern to make double stranded beanies for a little extra thickness and awesome colors! Just leave off the C and skip the white instructions :) 


Hook: J
Material: Red Heart Super Saver
Gauge: 3 rounds & 5 dc = 3”

Use two working strands similar in color.

All sizes:
Round 1) Using magic circle, ch 2, 12 dc in circle, pull tight, join to first st with sl st – 12 dc

Round 2) Ch 2, 2 dc in every st around, join to first st with sl st – 24 dc

Round 3) Ch 2, dc in 1st st, 2 dc in next st, *dc in next st, 2 dc in next st* around, join to first st with sl st – 36 dc

Baby size:
Round 4 - 6) Ch 2, dc in every st around, join to first st with sl st – 36 dc

Round 7 - 8) With white, ch 2, dc in every st around, join to first st with sl st – 36 dc

Round 9 – 10) With blues, ch 2, dc in every st around, join to first st with sl st – 36 dc

Tie off.

Toddler/young child size:
Round 4) Ch 2, dc in 1st st, dc in next st, 2 dc in next st, *dc in next 2 st, 2 dc in next st* around, join to first st with sl st – 48 dc

Round 5 - 7) Ch 2, dc in every st around, join to first st with sl st – 48 dc

Round 8 – 9) With white, ch 2, dc in every st around, join to first st with sl st – 48 dc

Round 10 – 11) With blues, ch 2, dc in every st around, join to first st with sl st – 48

Tie off.

Teen/adult size:
Round 4) Ch 2, dc in 1st st, dc in next st, 2 dc in next st, *dc in next 2 st, 2 dc in next st* around, join to first st with sl st – 48 dc

Round 5 - 9) Ch 2, dc in every st around, join to first st with sl st – 60 dc

Round 10 – 11) With white, ch 2, dc in every st around, join to first st with sl st – 60 dc

Round 12 – 13) With blues, ch 2, dc in every st around, join to first st with sl st – 60 dc

Tie off.

Colorado C – 2 options

Option 1(small C): With G hook and yellow:
Round 1) Using magic circle, ch 2, 10 hdc in every st around, join to first st with sl st and tie off – 10 hdc

Round 2) With red - Join 2 st before tie off with a ch 2, 2 dc in every st around until you reach the last 2 st and tie off.

Option 2 (large C): With G hook and yellow:
Round 1) Using magic circle, ch 2, 12 dc in circle, pull tight, join to first st with sl st – 12 dc

Round 2) Ch 2, 2 dc in every st around, join to first st with sl st and tie off – 24 dc

Round 3) With red, Join 2 st before tie off with a ch 2, dc in first st, 2 dc in next st, *dc in next st, 2 dc in next st* around until you have just a few stitches left – tie off.

Round 4) Join in first st of round 3 with a ch 2, dc in first 2 st, 2 dc in next st, *dc in next 2 st, 2 dc in next st* around to end – tie off

Sew or glue C over the white strip in the hat.


Sunday, September 28, 2014

Princess Graph Hats


Hook: I
Material: Worsted Weight Yarn (4) – like RHSS or ILTY
Gauge: 3 rows & 4 stitches = 1”

Hints & Tips:
-          Ch 2 doesn’t count as a st in any round
-          Don’t worry if the hat buckles a bit in the beginning, as you work down the rounds, it rounds out.
-          Giant kudos to the talented crocheting mama over at Stitched After Dark for making up these hats for me so I didn’t have too! I love it when I get to work with this lady. She saved me a bunch of time by making the item so I only had to write the pattern and make the graph! 
-          I only designed the hats and the graph, I did not design the braid. Go HERE to see how that lovely designer did it!

Abbreviations/Stitches:
-          MC – main color
-          CC – contrast color
-          Ch – chain
-          Dc – double crochet
-          Sl st – slip stitch
-          Fpdc – front post double crochet
-          Fpsc – front post single crochet


Size: Child – Toddler (1 – 3.5/4 years)   
Round 1) With MC - Using magic circle, ch 2, 12 dc in circle, pull tight and join to first dc with sl st – 12 dc

Round 2) Ch 2, 2 fpdc around every st around, join to first dc with sl st – 24 dc

Round 3) Ch 2, *fpdc around next st, 2 fpdc around next st* around, join to first dc with sl st  - 36 dc

Round 4) Ch 2, *fpdc around next 2 st, 2 fpdc around next st* around, join to first dc with sl st – 48 dc

Round 5) Ch 2, *fpdc around next 3 st, 2 fpdc around next st* around, join to first dc with sl st – 60 dc

Round 6 - 13) Ch 2, fpdc around every st around, join to first dc with sl st – 60 dc

Round 14) Ch 2, fpdc around first 29 st, change to CC, fpdc around next st, change to MC, fpdc around to end, join to first st with sl st – 60 dc

Round 15) Ch 2, fpdc around first 21 st, change to CC, fpdc around next st, change to MC, fpdc around next 6 st, change to CC, fpdc around next 3 st, change to MC, fpdc around next 6 st, change to MC, fpdc around to end, join to first st with sl st – 60 dc

Round 16) Ch 2, fpdc around first 15 st, change to CC, fpdc around next st, change to MC, fpdc around next 4 st, change to CC, fpdc around next 3 st, change to MC, fpdc around next 4 st, change to CC, fpdc around next 5 st, change to MC, fpdc around next 4 st, change to CC, fpdc around next 3 st, change to MC, fpdc around next 4 st, change to CC, fpdc around next st, change to MC, fpdc around to end, join to first st with sl st – 60 dc

Round 17) Ch 2, fpdc around first 14 st, change to CC, fpdc around next 3 st, change to MC, fpdc around next 2 st, change to CC, fpdc around next 5 st, change to MC, fpdc around next 2 st, change to CC, fpdc around next 7 st, change to MC, fpdc around next 2 st, change to CC, fpdc around next 5 st, change to MC, fpdc around next 2 st, change to CC, fpdc around next 3 st, change to MC, fpdc around to end, change to CC in last st, join to first st with sl st – 60 dc

Round 18 – 20) Ch 2, fpdc in every st around, join to first st with sl st – 60 dc

Round 21) With MC, ch 2, fpdc in every st around, join to first st with sl st – 60 dc

Round 22) Ch 1, fpsc in every st around, join to first st with sl st – 60 sc


Side: Teen/Adult
Round 1) With MC - Using magic circle, ch 2, 12 dc in circle, pull tight and join to first dc with sl st – 12 dc

Round 2) Ch 2, 2 fpdc around every st around, join to first dc with sl st – 24 dc

Round 3) Ch 2, *fpdc around next st, 2 fpdc around next st* around, join to first dc with sl st  - 36 dc

Round 4) Ch 2, *fpdc around next 2 st, 2 fpdc around next st* around, join to first dc with sl st – 48 dc

Round 5) Ch 2, *fpdc around next 3 st, 2 fpdc around next st* around, join to first dc with sl st – 60 dc

Round 6) Ch 2, *fpdc around next 4 st, 2 fpdc around next st* around, join to first dc with sl st – 72 dc

Round 7 - 15) Ch 2, fpdc around every st around, join to first dc with sl st – 72 dc

Round 16) Ch 2, fpdc around first 35 st, change to CC, fpdc around next st, change to MC, fpdc around to end, join to first st with sl st – 72 dc

Round 17) Ch 2, fpdc around first 27 st, change to CC, fpdc around next st, change to MC, fpdc around next 6 st, change to CC, fpdc around next 3 st, change to MC, fpdc around next 6 st, change to MC, fpdc around to end, join to first st with sl st – 72 dc

Round 18) Ch 2, fpdc around first 21 st, change to CC, fpdc around next st, change to MC, fpdc around next 4 st, change to CC, fpdc around next 3 st, change to MC, fpdc around next 4 st, change to CC, fpdc around next 5 st, change to MC, fpdc around next 4 st, change to CC, fpdc around next 3 st, change to MC, fpdc around next 4 st, change to CC, fpdc around next st, change to MC, fpdc around to end, join to first st with sl st – 72 dc

Round 19) Ch 2, fpdc around first 20 st, change to CC, fpdc around next 3 st, change to MC, fpdc around next 2 st, change to CC, fpdc around next 5 st, change to MC, fpdc around next 2 st, change to CC, fpdc around next 7 st, change to MC, fpdc around next 2 st, change to CC, fpdc around next 5 st, change to MC, fpdc around next 2 st, change to CC, fpdc around next 3 st, change to MC, fpdc around to end, change to CC in last st, join to first st with sl st – 72 dc

Round 20 - 22) Ch 2, fpdc in every st around, join to first st with sl st – 72 dc

Round 23) With MC, ch 2, fpdc in every st around, join to first st with sl st – 72 dc

Round 24) Ch 1, fpsc in every st around, join to first st with sl st – 72 sc


Wednesday, September 17, 2014

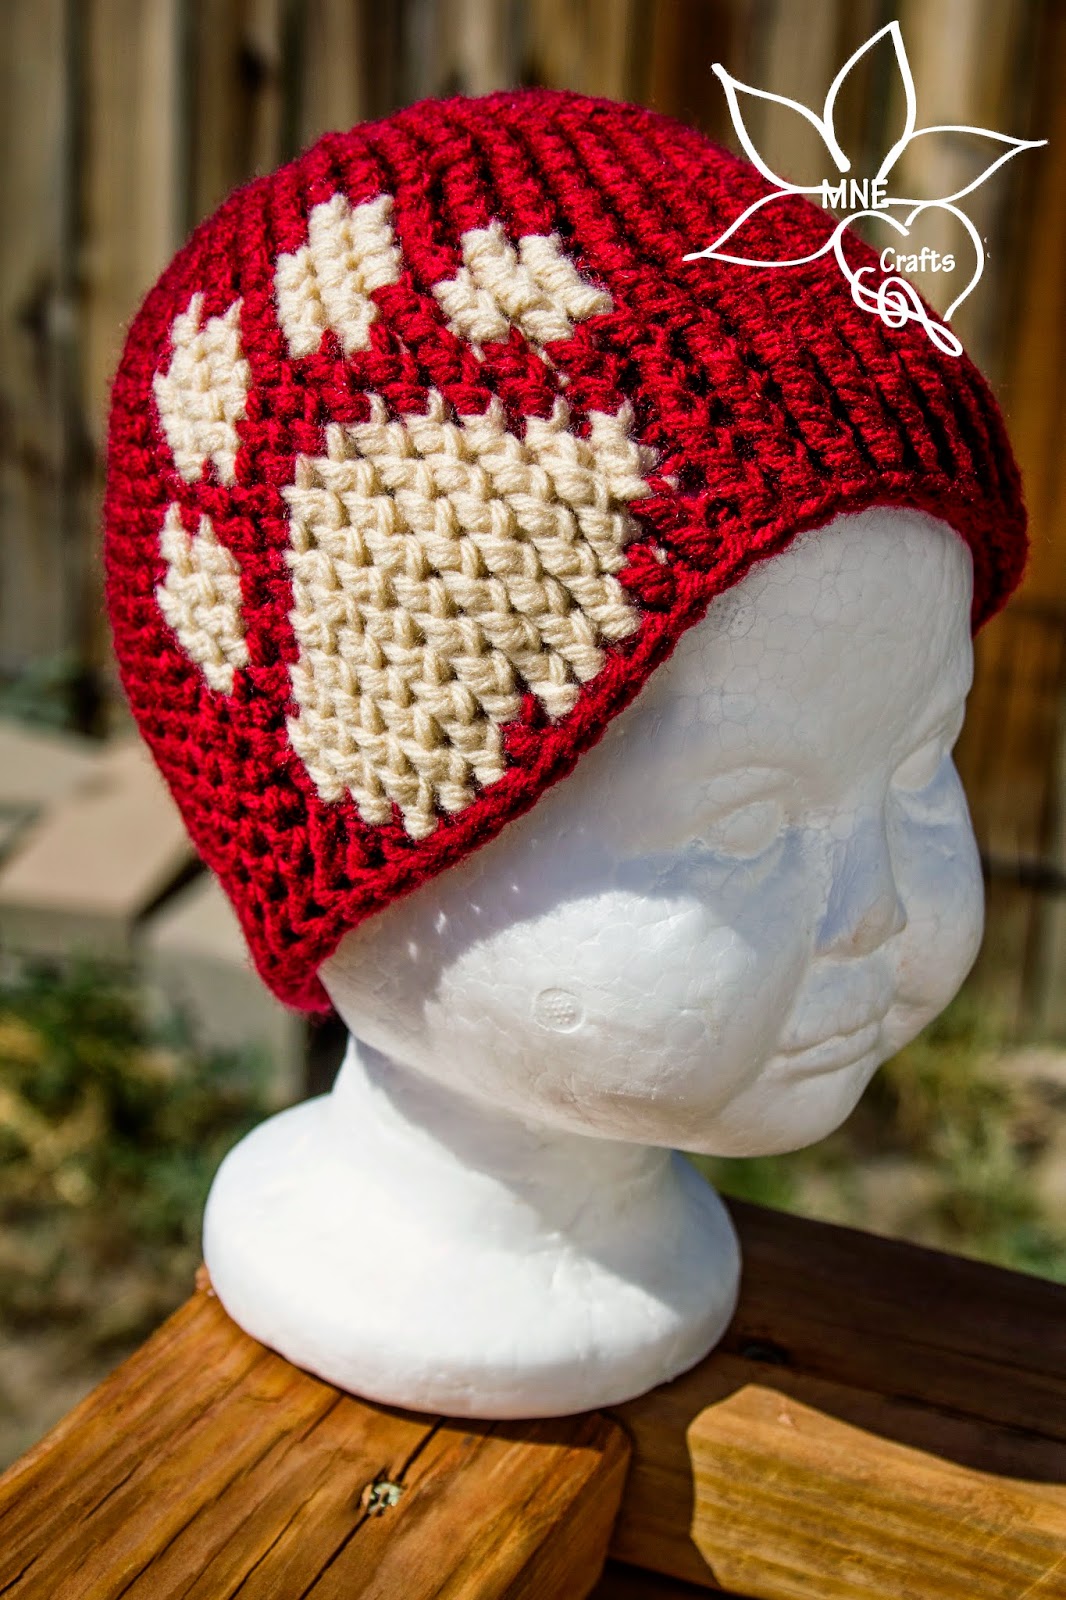
Paw Print Graph Pattern


Hook: I
Material:
Red Heart Super Saver or Loops & Thread Impeccable
Gauge: 4 rows & 4 stitches = 1”

Size: Baby – 0-6 months
Round 1) With MC - Using magic circle, ch 2, 12 dc in circle, pull tight and join to first dc with sl st – 12 dc

Round 2) Ch 2, 2 fpdc around every st around, join to first dc with sl st – 24 dc

Round 3) Ch 2, *fpdc around next st, 2 fpdc around next st* around, join to first dc with sl st  - 36 dc

Round 4) Ch 2, *fpdc around next 2 st, 2 fpdc around next st* around, join to first dc with sl st – 48 dc

Round 5 - 6) Ch 2, fpdc around every st around, join to first dc with sl st – 48 dc

Round 7) Ch 2, fpdc around next 14 st, change to CC, fpdc around next st, change to MC, fpdc around next 3 st, change to CC, fpdc around next st, change to MC, fpdc around to end, join to first st with sl st – 48 dc

Round 8) Ch 2, fpdc around next 13 st, change to CC, fpdc around next 3 st, change to MC, fpdc around next st, change to CC, fpdc around next 3 st, change to MC, fpdc around to end, join to first st with sl st – 48 dc

Round 9 - 10) Repeat round 8 – 48 dc

Round 11) Ch 2, fpdc around next 11 st, change to CC, fpdc around next st, change to MC, fpdc around next 2 st, change to CC, fpdc around next st, change to MC, fpdc around next 3 st, change to CC, fpdc around next st, change to MC, fpdc around next 2 st, change to CC, fpdc around next st, change to MC, fpdc around to end, join to first st with sl st – 48 dc

Round 12) Ch 2, fpdc around next 10 st, change to CC, fpdc around next 3 st, change to MC, fpdc around next 7 st, change to CC, fpdc around next 3 st, change to MC, fpdc around to end, join to first st with sl st – 48 dc

Round 13) Ch 2, fpdc around next 10 st, change to CC, fpdc around next 3 st, change to MC, fpdc around next 2 st, change to CC, fpdc around next 3 st, change to MC, fpdc around next 2 st, change to CC, fpdc around next 3 st, change to MC, fpdc around to end, join to first st with sl st – 48 dc

Round 14) Ch 2, fpdc around next 10 st, change to CC, fpdc around next 2 st, change to MC, fpdc around next 2 st, change to CC, fpdc around next 5 st, change to MC, fpdc around next 2 st, change to CC, fpdc around next 2 st, change to MC, fpdc around to end, join to first st with sl st – 48 dc

Round 15) Ch 2, fpdc around next 13 st, change to CC, fpdc around next 7 st, change to MC, fpdc around to end, join to first st with sl st – 48 dc

Round 16) Ch 2, fpdc around next 12 st, change to CC, fpdc around next 9 st, change to MC, fpdc around to end, join to first st with sl st – 48 dc

Round 17) Ch 2, fpdc around next 11 st, change to CC, fpdc around next 11 st, change to MC, fpdc around to end, join to first st with sl st – 48 dc

Round 18) Repeat round 17

Round 19) Ch 1, fpdc around next 12 st, change to CC, fpdc around next 9 st, change to MC, fpdc around to end, join to first st with sl st – 48 dc

Round 20) Ch 1, fpdc around next 13 st, change to CC, fpdc around next 3 st, change to MC, fpdc around next, change to CC, fpdc around next 3 st, change to MC, fpdc around to end, join to first st with sl st – 48 dc

Round 21) Ch 1, fpsc in every st around, join to first st with sl st and tie off – 48 sc

Size: Child – Toddler (1 – 3.5/4 years)   
Round 1) With MC - Using magic circle, ch 2, 12 dc in circle, pull tight and join to first dc with sl st – 12 dc

Round 2) Ch 2, 2 fpdc around every st around, join to first dc with sl st – 24 dc

Round 3) Ch 2, *fpdc around next st, 2 fpdc around next st* around, join to first dc with sl st  - 36 dc

Round 4) Ch 2, *fpdc around next 2 st, 2 fpdc around next st* around, join to first dc with sl st – 48 dc

Round 5) Ch 2, *fpdc around next 3 st, 2 fpdc around next st* around, join to first dc with sl st – 60 dc

Round 6 - 8) Ch 2, fpdc around every st around, join to first dc with sl st – 60 dc

Round 9) Ch 2, fpdc around next 19 st, change to CC, fpdc around next st, change to MC, fpdc around next 3 st, change to CC, fpdc around next st, change to MC, fpdc around to end, join to first st with sl st – 60 dc

Round 10) Ch 2, fpdc around next 18 st, change to CC, fpdc around next 3 st, change to MC, fpdc around next st, change to CC, fpdc around next 3 st, change to MC, fpdc around to end, join to first st with sl st – 60 dc

Round 11 - 12) Repeat round 10 – 60 dc

Round 13) Ch 2, fpdc around next 16 st, change to CC, fpdc around next st, change to MC, fpdc around next 2 st, change to CC, fpdc around next st, change to MC, fpdc around next 3 st, change to CC, fpdc around next st, change to MC, fpdc around next 2 st, change to CC, fpdc around next st, change to MC, fpdc around to end, join to first st with sl st – 60 dc

Round 14) Ch 2, fpdc around next 15 st, change to CC, fpdc around next 3 st, change to MC, fpdc around next 7 st, change to CC, fpdc around next 3 st, change to MC, fpdc around to end, join to first st with sl st – 60 dc

Round 15) Ch 2, fpdc around next 15 st, change to CC, fpdc around next 3 st, change to MC, fpdc around next 2 st, change to CC, fpdc around next 3 st, change to MC, fpdc around next 2 st, change to CC, fpdc around next 3 st, change to MC, fpdc around to end, join to first st with sl st – 60 dc

Round 16) Ch 2, fpdc around next 15 st, change to CC, fpdc around next 2 st, change to MC, fpdc around next 2 st, change to CC, fpdc around next 5 st, change to MC, fpdc around next 2 st, change to CC, fpdc around next 2 st, change to MC, fpdc around to end, join to first st with sl st – 60 dc

Round 17) Ch 2, fpdc around next 18 st, change to CC, fpdc around next 7 st, change to MC, fpdc around to end, join to first st with sl st – 60 dc

Round 18) Ch 2, fpdc around next 17 st, change to CC, fpdc around next 9 st, change to MC, fpdc around to end, join to first st with sl st – 60 dc

Round 19) Ch 2, fpdc around next 16 st, change to CC, fpdc around next 11 st, change to MC, fpdc around to end, join to first st with sl st – 60 dc

Round 20) Repeat round 19

Round 21) Ch 1, fpdc around next 17 st, change to CC, fpdc around next 9 st, change to MC, fpdc around to end, join to first st with sl st – 60 dc

Round 22) Ch 1, fpdc around next 18 st, change to CC, fpdc around next 3 st, change to MC, fpdc around next, change to CC, fpdc around next 3 st, change to MC, fpdc around to end, join to first st with sl st – 60 dc

Round 23) Ch 1, fpsc in every st around, join to first st with sl st and tie off – 60 sc

Size: Teen/Adult
Round 1) With MC - Using magic circle, ch 2, 12 dc in circle, pull tight and join to first dc with sl st – 12 dc

Round 2) Ch 2, 2 fpdc around every st around, join to first dc with sl st – 24 dc

Round 3) Ch 2, *fpdc around next st, 2 fpdc around next st* around, join to first dc with sl st - 36 dc

Round 4) Ch 2, *fpdc around next 2 st, 2 fpdc around next st* around, join to first dc with sl st – 48 dc

Round 5) Ch 2, *fpdc around next 3 st, 2 fpdc around next st* around, join to first dc with sl st – 60 dc

Round 6) Ch 2, *fpdc around next 4 st, 2 fpdc around next st* around, join to first dc with sl st – 72 dc

Round 7 - 10) Ch 2, fpdc around every st around, join to first dc with sl st – 72 dc

Round 11) Ch 2, fpdc around next 19 st, change to CC, fpdc around next st, change to MC, fpdc around next 3 st, change to CC, fpdc around next st, change to MC, fpdc around to end, join to first st with sl st – 72 dc

Round 12) Ch 2, fpdc around next 18 st, change to CC, fpdc around next 3 st, change to MC, fpdc around next st, change to CC, fpdc around next 3 st, change to MC, fpdc around to end, join to first st with sl st – 72 dc

Round 13 - 14) Repeat round 12 – 72 dc

Round 15) Ch 2, fpdc around next 16 st, change to CC, fpdc around next st, change to MC, fpdc around next 2 st, change to CC, fpdc around next st, change to MC, fpdc around next 3 st, change to CC, fpdc around next st, change to MC, fpdc around next 2 st, change to CC, fpdc around next st, change to MC, fpdc around to end, join to first st with sl st – 72 dc

Round 16) Ch 2, fpdc around next 15 st, change to CC, fpdc around next 3 st, change to MC, fpdc around next 7 st, change to CC, fpdc around next 3 st, change to MC, fpdc around to end, join to first st with sl st – 72 dc

Round 17) Ch 2, fpdc around next 15 st, change to CC, fpdc around next 3 st, change to MC, fpdc around next 2 st, change to CC, fpdc around next 3 st, change to MC, fpdc around next 2 st, change to CC, fpdc around next 3 st, change to MC, fpdc around to end, join to first st with sl st – 72 dc

Round 18) Ch 2, fpdc around next 15 st, change to CC, fpdc around next 2 st, change to MC, fpdc around next 2 st, change to CC, fpdc around next 5 st, change to MC, fpdc around next 2 st, change to CC, fpdc around next 2 st, change to MC, fpdc around to end, join to first st with sl st – 72 dc

Round 19) Ch 2, fpdc around next 18 st, change to CC, fpdc around next 7 st, change to MC, fpdc around to end, join to first st with sl st – 72 dc

Round 20) Ch 2, fpdc around next 17 st, change to CC, fpdc around next 9 st, change to MC, fpdc around to end, join to first st with sl st – 72 dc

Round 21) Ch 2, fpdc around next 16 st, change to CC, fpdc around next 11 st, change to MC, fpdc around to end, join to first st with sl st – 72 dc

Round 22) Repeat round 21

Round 23) Ch 1, fpdc around next 17 st, change to CC, fpdc around next 9 st, change to MC, fpdc around to end, join to first st with sl st – 72 dc

Round 24) Ch 1, fpdc around next 18 st, change to CC, fpdc around next 3 st, change to MC, fpdc around next, change to CC, fpdc around next 3 st, change to MC, fpdc around to end, join to first st with sl st – 72 dc


Round 25) Ch 1, fpsc in every st around, join to first st with sl st and tie off – 72 sc