

***The graph used for this tutorial has not yet been released. I plan on releasing a written pattern for it very soon along with a few other spring graph hats! Also, just because I've seen this done to other designers, comments about my nails won't be approved for the blog :p I keep them short because I prefer them short lol - otherwise, enjoy and I really hope this tutorial helps you!***
I currently have near 20 different graph hats out and, in the past year of designing them all I've gotten some common questions from various people wanting to make them. So, I decided to make a step by step photo tutorial showing the different techniques I apply and how I arrive at the finished product as well as why I size the hat the way I do. :)
If you have any additional questions, feel free to ask!
Now, first things first. Let's talk about color changes and carrying yarn as that is the most common question I get and will be what I most go over in this tutorial. Throughout the images, you will see 4 different methods I use. All of them work and will give you a great looking graph hat... they are just a different way of getting to that final result.
- Carrying the yarn
- Cutting and rejoining
- Making bobbins
- Estimating how much more yarn I'll need and cutting to that length.
Before we can get any farther into the color changes, let's get the hat started!

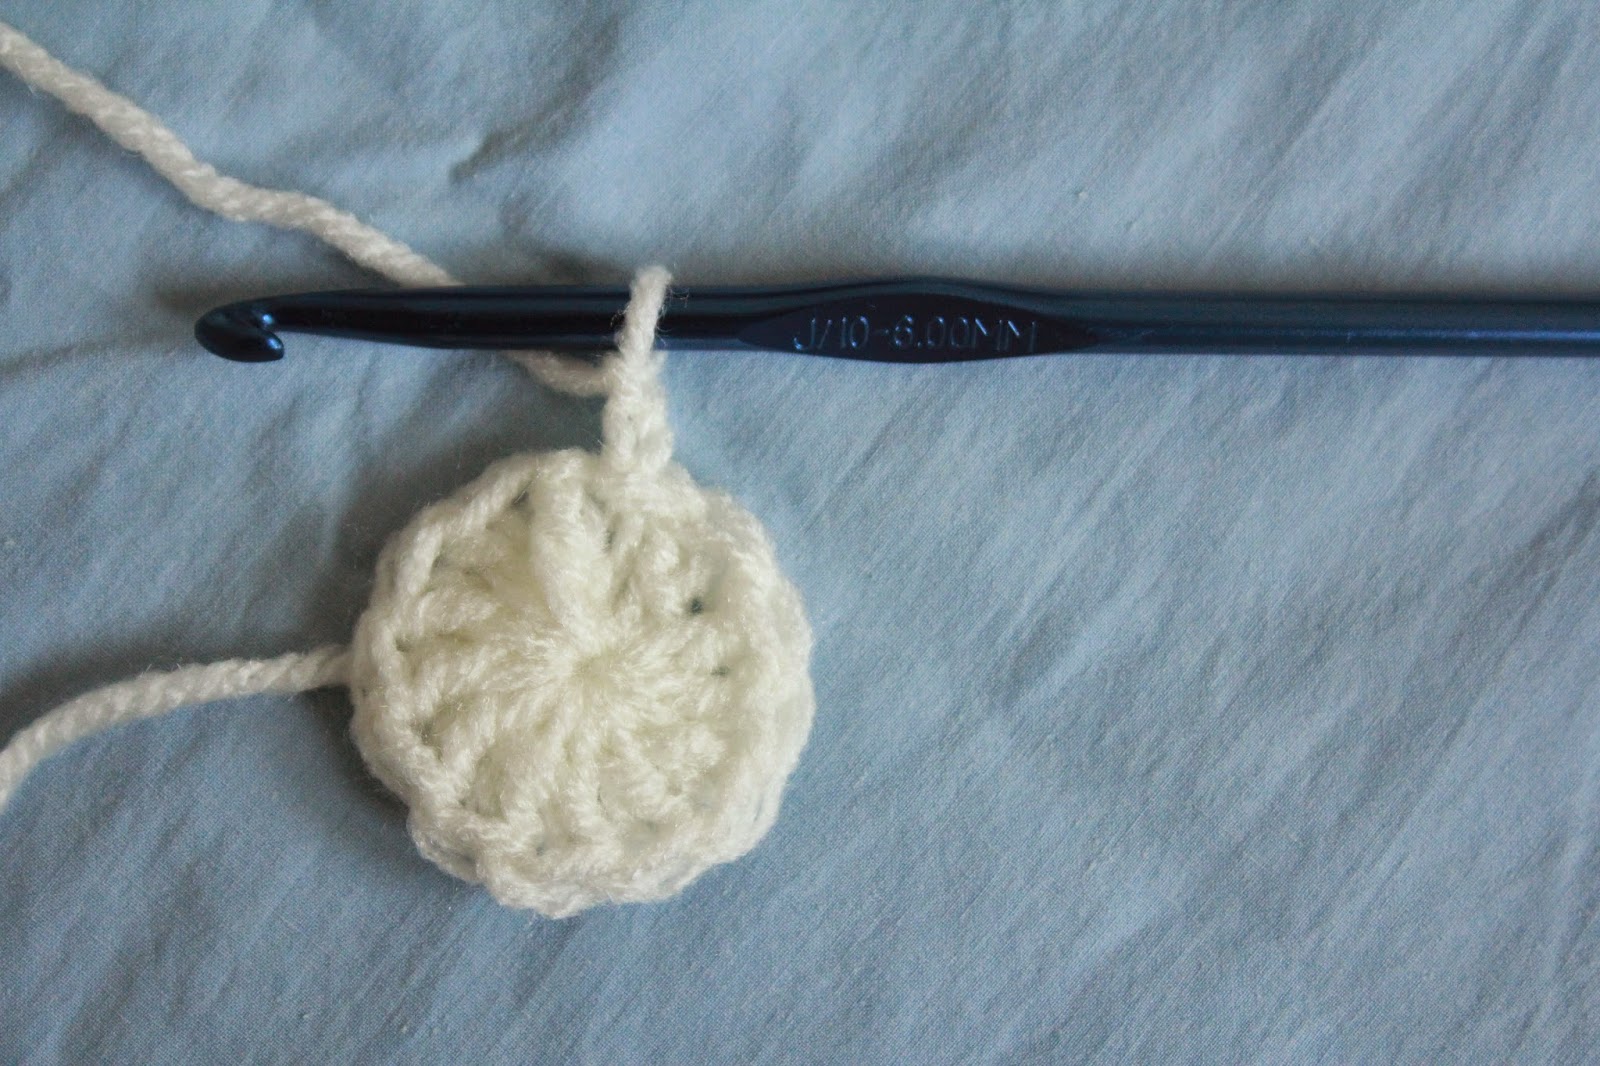
First we have round 1 which consists of 12 dc in a magic circle. This image shows exactly why I prefer to use the magic circle method as it leaves no hole at the top! If you are unfamiliar with it, you can view a tutorial of it HERE.
The start of round two comes with a ch 2 - I use a chain 2 because it makes it where the fpdc doesn't get pulled down or up and fits between the rounds nicely.
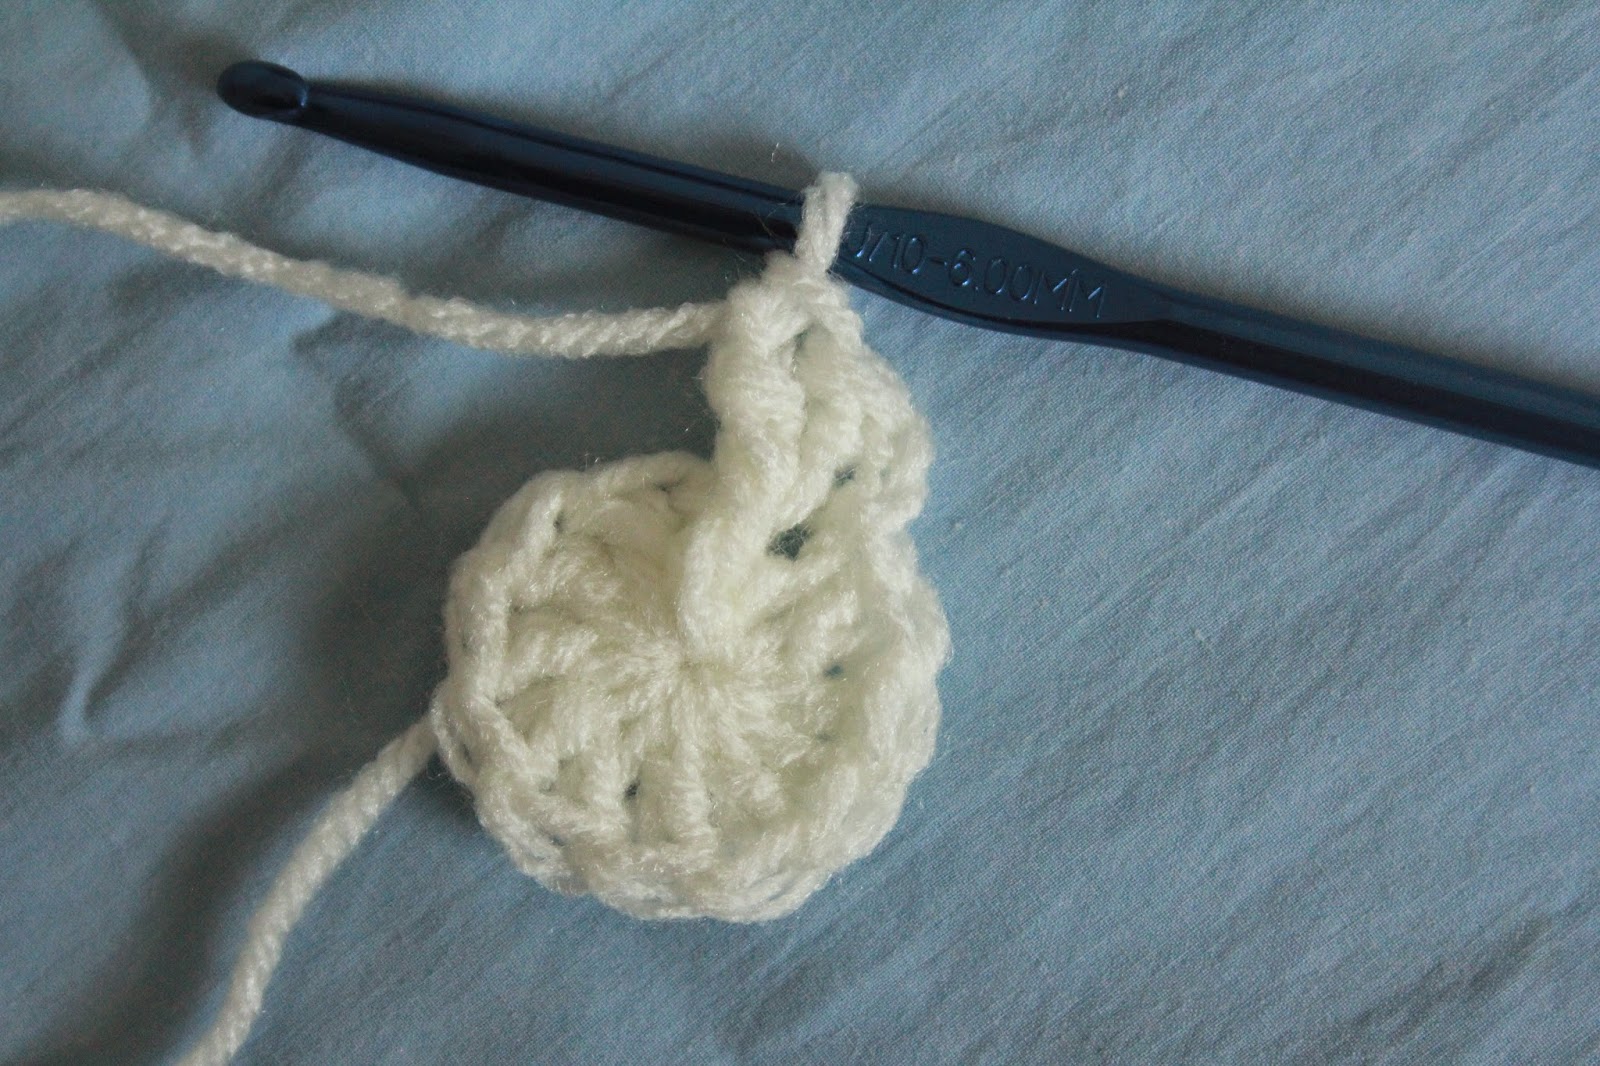
Here you see 2 fpdc around the first stitch. This same thing will be done around every stitch. You can find a tutorial on how to do front post double crochets HERE.

In this photo you see me joining into the first st of the round. You skip the ch 2 and join directly into the first st as if the ch 2 isn't there.

This is the start of round three. You can see that the first st has one fpdc and the next has 2. This is similar to regular increase rounds but uses fpdc as the stitch.

This image skips ahead a bit and shows you a few stitches into round 6 where there are no increases, you just do one fpdc around every stitch.

And you repeat that until it's time to start the graph, which for this hat, wasn't until round 15!

I'll be showing you multiple methods used within one hat. One of these methods will be the bobbin method. I'll be using this method with the flower petals and got them all wound up and ready to go.

When I get to my first color change, I do it as I would any other color change. If you are unfamiliar with how to change colors in double crochet, you can find a tutorial video HERE.
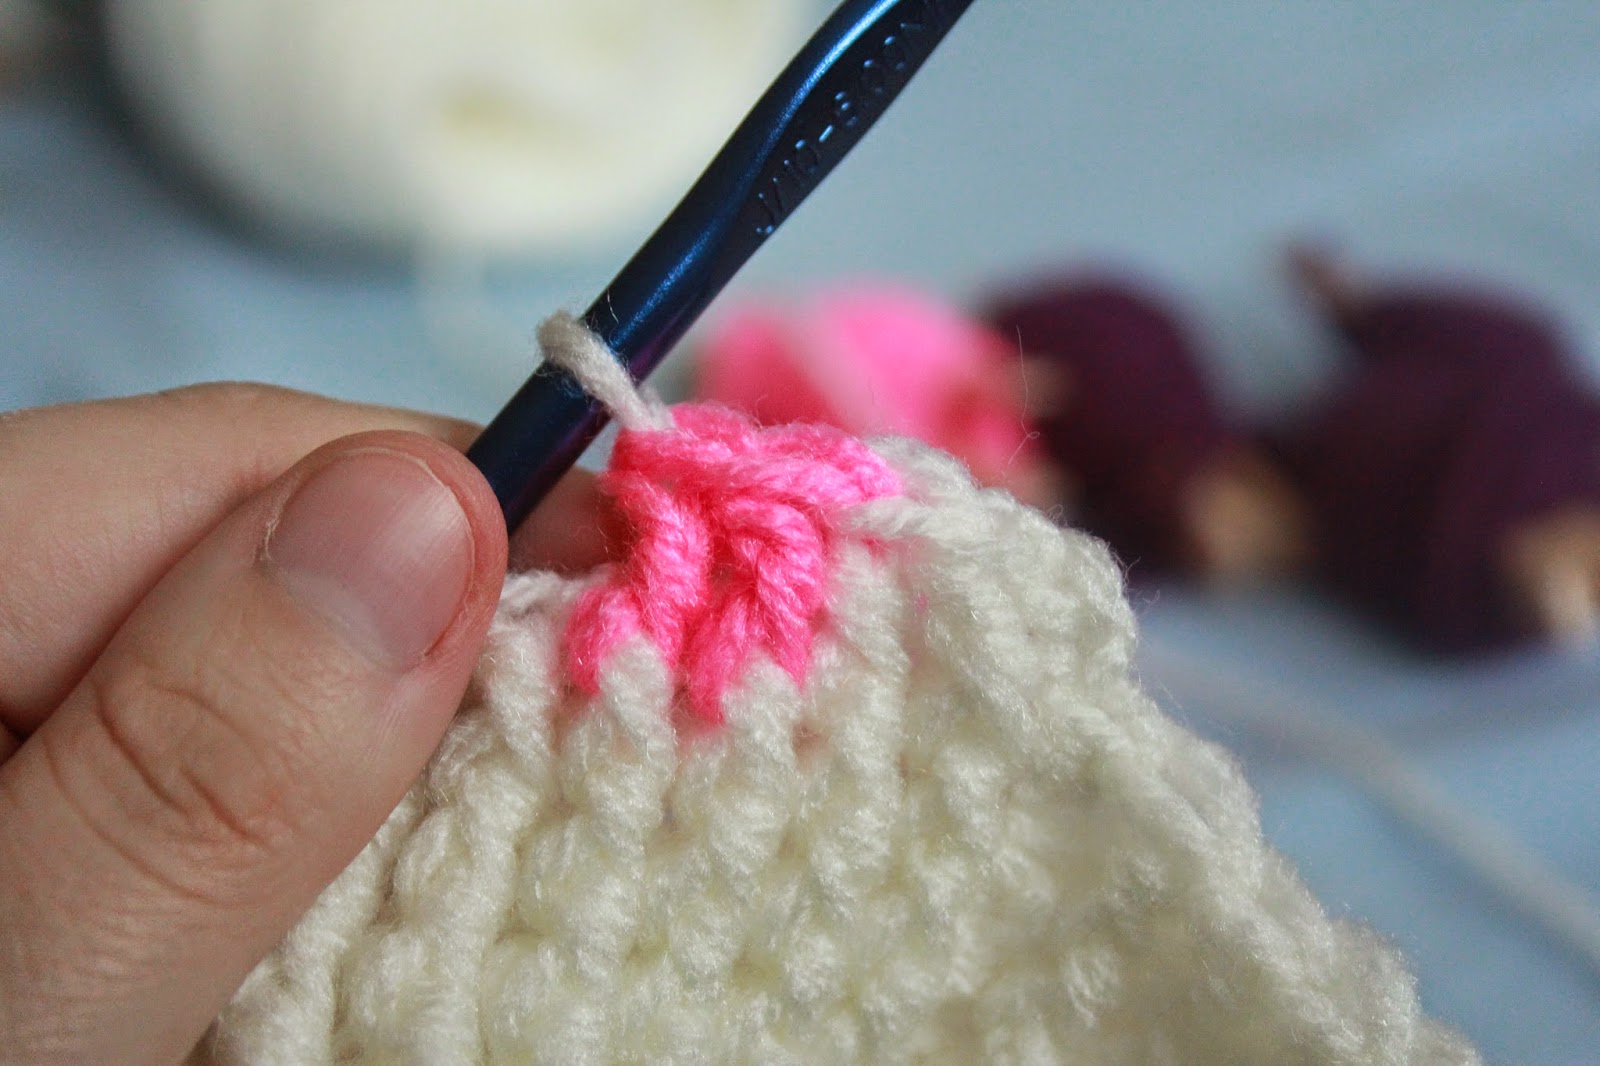
And then I change back to white. This step is important because I use two different color changing methods basically at once. We're using the bobbin method with the flower and carrying the base color along.

Like this :)

I just stick the bobbins in the hat as I go along. :)

Next, is another method. The cut and rejoin method. I wouldn't normally use this method right here but for the sake of a tutorial, here you go. This method does involve more work at the end because something has to be done with all of those ends but it doesn't affect the stretch of the hat at all, which is a plus.

Here we see, that despite using a bobbin so we don't have to do any additional carrying or excessive cutting, the yarn does still get carried to an extent. Because the hat is worked in the round, we don't pick up right where we left off, we pick up on the other side where we had originally started.
This next image shows another method I use. It is similar to the bobbin method but without the bobbin :p Because I know I only need the yellow for 2 more stitches in the next round, I pull out and cut the amount I think I'll need and just let it hang out until I use it all up.

This picture goes hand in hand with the next, so please pay close attention to the next image.

Because this hat typically requires some carrying, the concern of it decreasing stretch arises. Fortunately, there is a simple solution to this so that it won't affect stretch *at all*. If you look at the first image, you'll see how the yarn angles up as I wrap it around the hook but in the second pic, it's level with the hat. By doing it the second way, I give just enough slack in the carried yarn to where I keep the stretch of the hat but don't have excess yarn just hanging out on the inside of the hat. You'll get a good look at the inside of the hat farther down to see what I mean about it being "just right". You want the yarn to remain relaxed when the hat is relaxed so that it carries the same stretch as the stitches do.

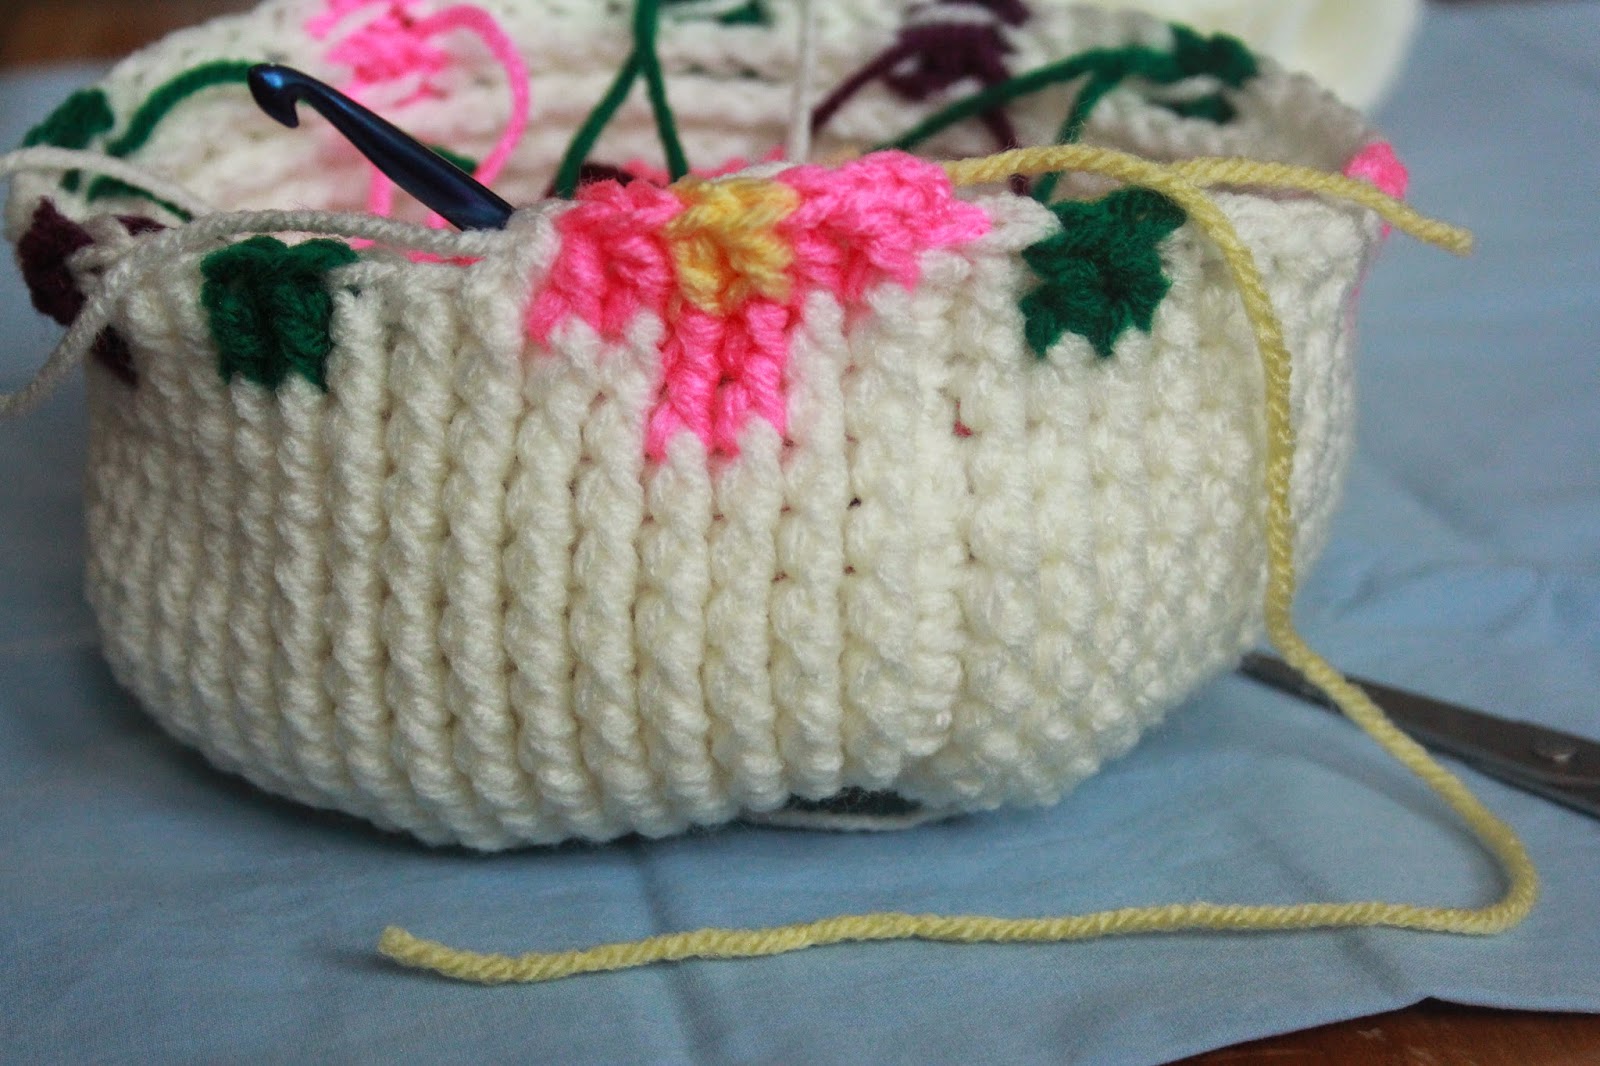
This image takes us to the last round of the graph. You'll see the strand of pink there showing that I cut it from the bobbin. As I finish with each color, I just cut it so that it's the size I need it to weave in or tie off (depending on what I decide to do with that particular hat) so that when I'm all the way done with the round, I can just keep going with the remaining rounds without things weighing down the middle of the hat.

Now that we are at the end of the hat, let's compare our methods. You can see the leaf has about double the number of ends on the flowers. I normally would have used the same method that I did for the center of the flowers for the leaves since there were only four rounds and 10 stitches total per leaf. It would have cut down my weave in/tie off time and saved yarn. :p You can also see the carrier yarn and hopefully the image gives you an idea of what I meant by "relaxed" earlier. The yarn, despite being carried, isn't loose to where it will snag easily or tight to where it will prevent stretch or be felt on the hat. It doesn't add any additional thickness to the hat and almost goes into the little slips between rounds!

One method I use to tie off ends is a slip knot which can then be followed by fabric glue (just a tiny drop so it won't be felt). I do this by going through two loops near the hat, pulling up a loop and then pulling the strand through the loop.

I also will just tie off the ends. The thickness of the hat hides the knots well to where they can't be felt (I know because I have worn the hats I've made and even wore this one!) but weaving in is usually the best route to go. I was running out of daylight to take pictures with so I had to take the easy way out ;)
Now... the final product!!!
When you look at this image and the next image, I want you to take into consideration that they are the SAME exact hat (not two hats with the same graph but literally the same hat). The stretch is good enough to where it will fit my four year old's little head and my grown-up large head. :p
What's significant about this is how I achieved it. By using a J hook, meeting the gauge I now list on my graph hat patterns (3rd & 3st = 1") I'm able to achieve a hat that can be made much quicker and will fit MOST sizes without changing the pattern. Great right? The only drawback is this also limits the size of the graph as I only have 17 rounds and 60 stitches to get a graph into. However, this can easily be resolved by throwing quick and multi-size to the wind. I'll talk more about that with an example of a much larger graph I put onto a hat ;)

Here is me wearing the hat. :) (Be nice, I haven't been feeling well :p) The only change I really suggest making to get a full adult size is to add an additional round or two before you start the graph so it's a tad bit longer, but as you can see... that isn't a must, it's a personal preference because if I'm going to wear a beanie, I want it to be longish.
Now... onto the the largest graph I've put on a hat. The graph was 44 st wide by 30 st long AND the graph had to fit on just the front of the hat. The hat ended up being about 40ish rounds and 90 stitches around! I achieved this by going all the way down to an F hook!

As you can see, this technique has no limits! :) And you can get even bigger if you go to a smaller yarn weight. This was still made with red heart super saver :p
Great tutorial!! The larger graph hat in progress looks amazing!
ReplyDeleteThanks! And not in progress. I finished it thank god! It had At least 2k stitches! Haha
DeleteThanks! And not in progress. I finished it thank god! It had At least 2k stitches! Haha
DeleteOH MY GOSH...I seriously cannot wait to get started on something "graphy" now!! Thank you so much!!!!
ReplyDeletethis is so cool....thanks for the detailed tutorial...I just saw a hello kitty blanket awhile back, do you know where I can get a pattern for that??? I'd like to try them on kiddie pants for my granddaughter...thanks a lot...
ReplyDeleteI don't have a graph for hello kitty myself but check out the facebook group Graphs for Hats that I run with a friend. She makes a lot of graphs and may be able to make one up for you!
DeleteI just finished my first graph hat! So fun! I also found your FB group and joined. I have some ideas of graph hats I'd like to make when I learn more about how to do them.
ReplyDelete