
Hook: 7 – 4.5 (a G hook but verify the number)
Material: Martha Stewart Crafts Extra Soft Wool Blend
Gauge: (non-essential)
Hints & Tips:
-
Ch 1 doesn’t count as a stitch
-
When doing round 2, the 2nd fpdc goes
in front of the 1st fpdc
-
When you do the squares with all three colors,
you will start off with color B and C, alternating them in the first round and
then only putting a color B fpdc around a color B and a color C around a color
C
-
I will be releasing a video for this square in
the next few days which I will use to show you where the third loop is in the
stitch so you can complete the square correctly.
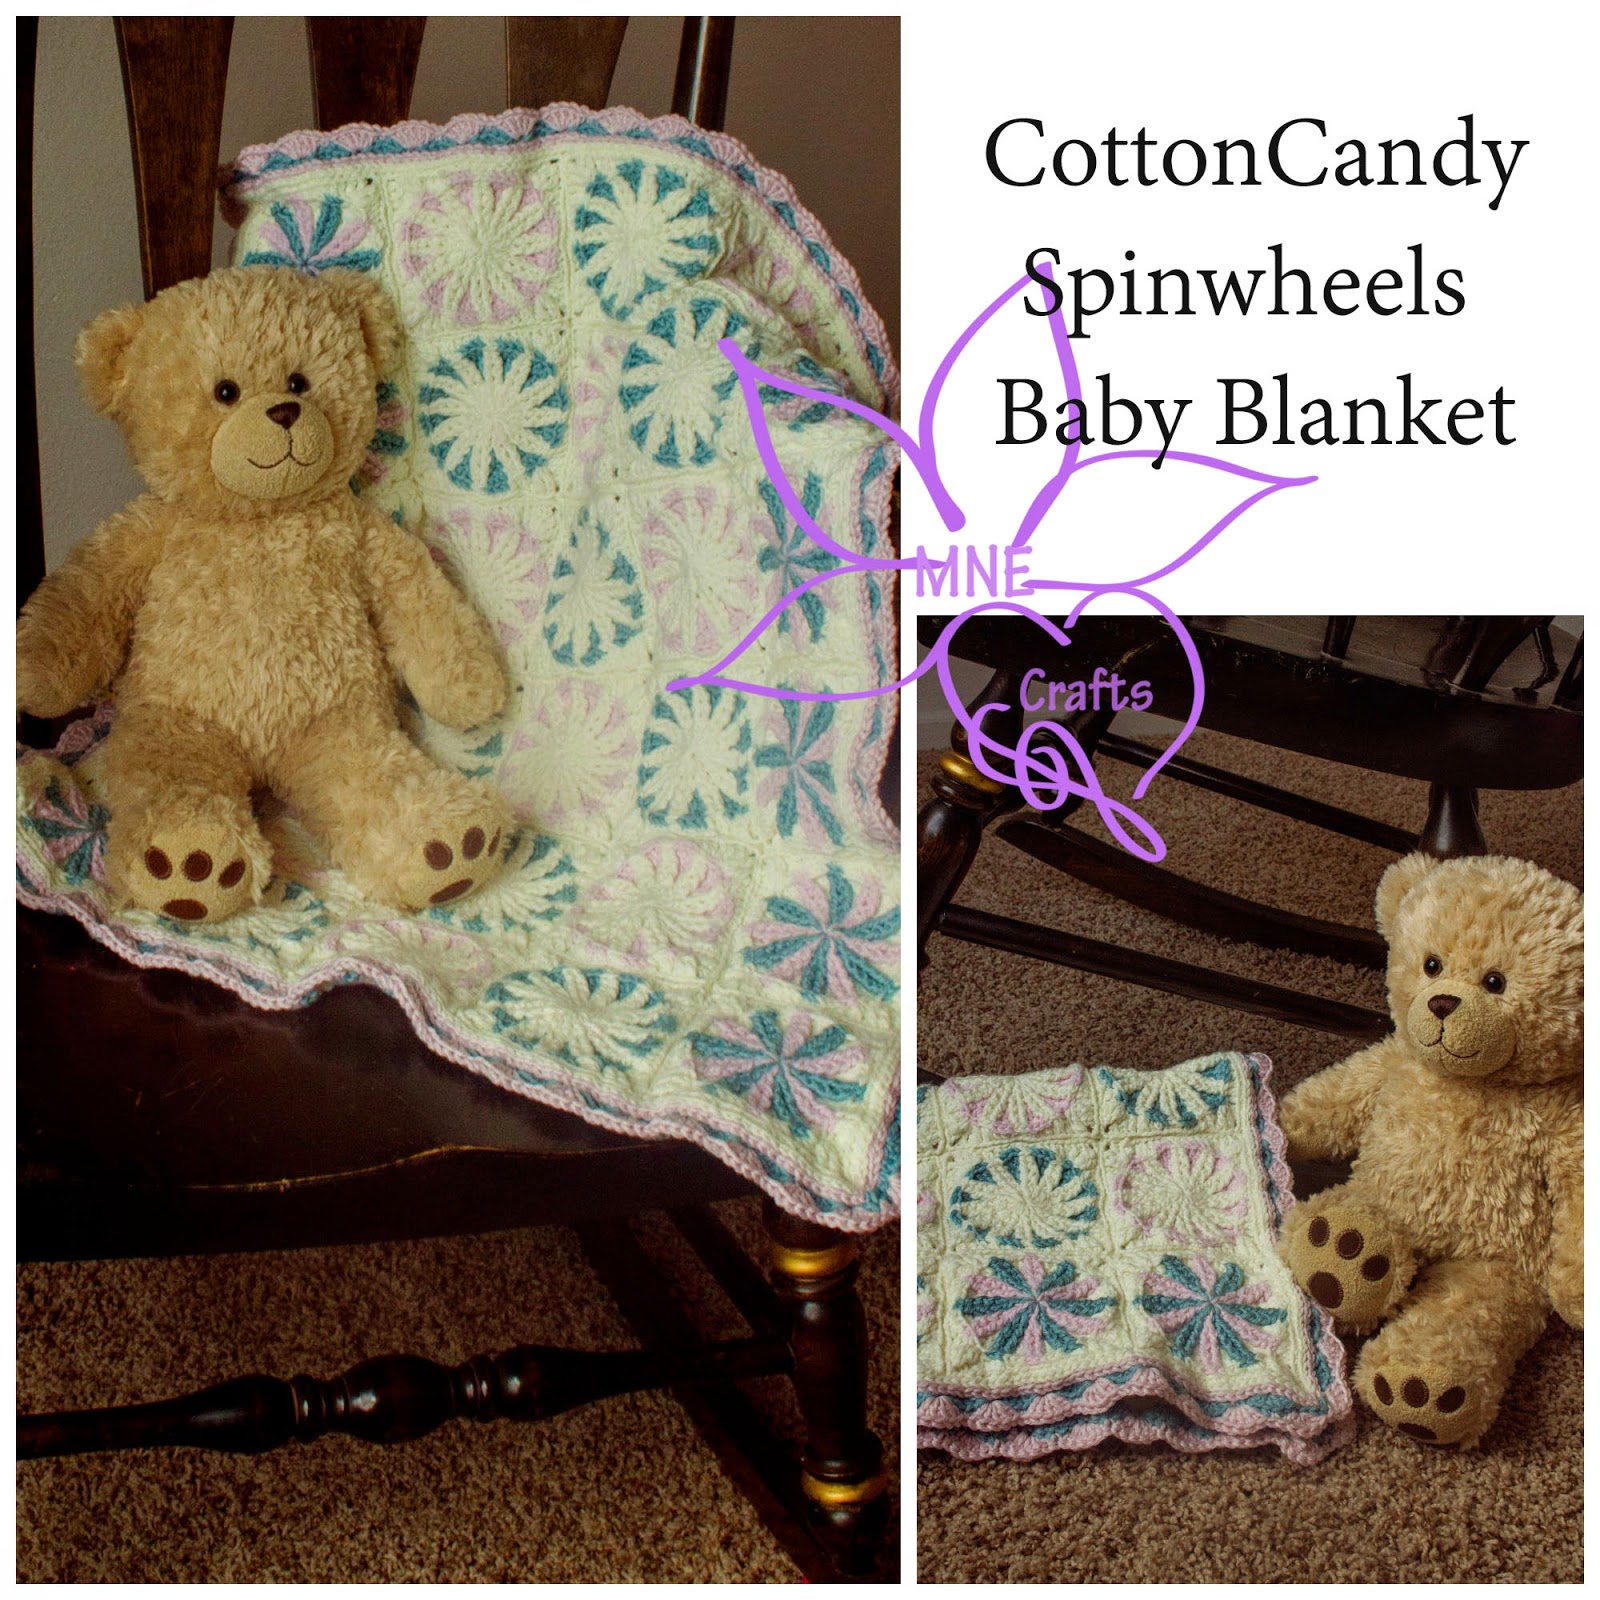
- I recommend the yarn I do because of the color options and how darn soft the material is. It makes an absolutely perfect baby blanket! Lion Brand has the absolute best customer service I think I've ever exerienced. The first three rolls of yarn I purchased had some problems towards the middle. I contacted Lion Brand and not even a week later I had all three colors arrive at my door step. It was absolutely fantastic.
- For the size I made, I used about 8 rolls, four of which were white.
Special stitches:
- half Trbc - YO twice, insert hook into stitch, YO, pull up a loop, YO, pull through two loops on hook, YO, pull over remaining loops on hook - with a trbc you will YO and pull through two loops three times, but with the half, you only YO twice.
- half Trbc - YO twice, insert hook into stitch, YO, pull up a loop, YO, pull through two loops on hook, YO, pull over remaining loops on hook - with a trbc you will YO and pull through two loops three times, but with the half, you only YO twice.
Color A: white
Color B: pink
Color C: blue
With color A
Round 1) Using magic circle, ch 1, dc 12, pull tight,
join to first dc with sl st – 12 dc
Round 2) Ch 1, 2 fpdc around every st, join to first fpdc
with sl st – 24 dc
Round 3) Ch 1, *fpdc around next 2 st, change to color B
(or C), dc in between last fpdc and next fpdc, change to color A* around, join
to first dc with sl st – 36 dc
Round 4) Ch 1, *fpdc around next 2 st, change to color B
(or C), dc in between fpdc and dc, dc in between dc and next fpdc, change to
color A* around, join to first dc with sl st – 48 dc
Round 5) Ch 1, *fpdc around next 2 st, change to color B
(or C), dc in next dc, dc in between dc and next dc, dc in next dc, change to
color A*, around, join to first dc with sl st – 60 dc
Round 6) Working in 3rd loop only: ch 1, dc in
next 2 st, *half trbc in next st, 2 trbc… ch 2… 2 trbc all in next st, dc in
next 2 st, hdc in next 2 st, sc in next 4 st, hdc in next 2 st, dc in next 2
st, half trbc in next st* repeat to end, join to first dc with sl st
To join:
Edging:
Round 1) With color A - Join in any corner with a ch 1, work
in 3rd loop only - *2 sc, ch 1, 2 sc in corner, sc in every st across* repeat
around blanket, join to first sc with sl st
Round 2) Repeat round 1 with color B
These next instructions are not specific because
depending on the size of your blanket you will end up with a different stitch
count then I did.
Round 3) In corner: working in 3rd loop only -
sc, ch 1, sc – between corners, shell stitch – 5 dc in next st, skip next 2 st,
sc in next st, skip next 2 st across and then repeat corner and shell
instructions all the way around.
Round 4) 1 sc in every corner – Shell (5 dc in 1 st) in
every sc and 1 sc in every 3rd st of every shell, join to first st
with sl st and tie off
Placement:
I made a 7 square long by 6 square wide baby blanket. I
did not measure the exact dimensions of the blanket as I was making it as a
gift for a baby shower that got planned a bit sooner due to the mommy to be
moving. I used the squares requiring three colors for the outside long edges of
the blanket and then alternated the squares requiring two colors on the inside.
Really, you can do whatever you want with this design because it will look
beautiful regardless!
No comments:
Post a Comment